What the Condition node does
The Condition node lets you branch a flow based on data. Instead of sending every user to the same next step, you can check a value first and then decide which path should run.
Common examples include checking whether an email already exists, whether a lead source matches a campaign, whether a user selected a certain button, or whether an action returned useful data.
Step 1: Add the Condition node and open the editor
Add a Condition node where the flow needs a decision. When the editor opens, start with one rule before you build more complex logic.

For most beginner flows, one clear condition is better than several partial rules. It keeps the branch easier to review.
Step 2: Pick the variable or field to evaluate
The first part of a condition is the value you want to inspect. In the variable picker, choose the source that actually contains the data you need: contact fields, application variables, system values, or outputs from earlier actions.
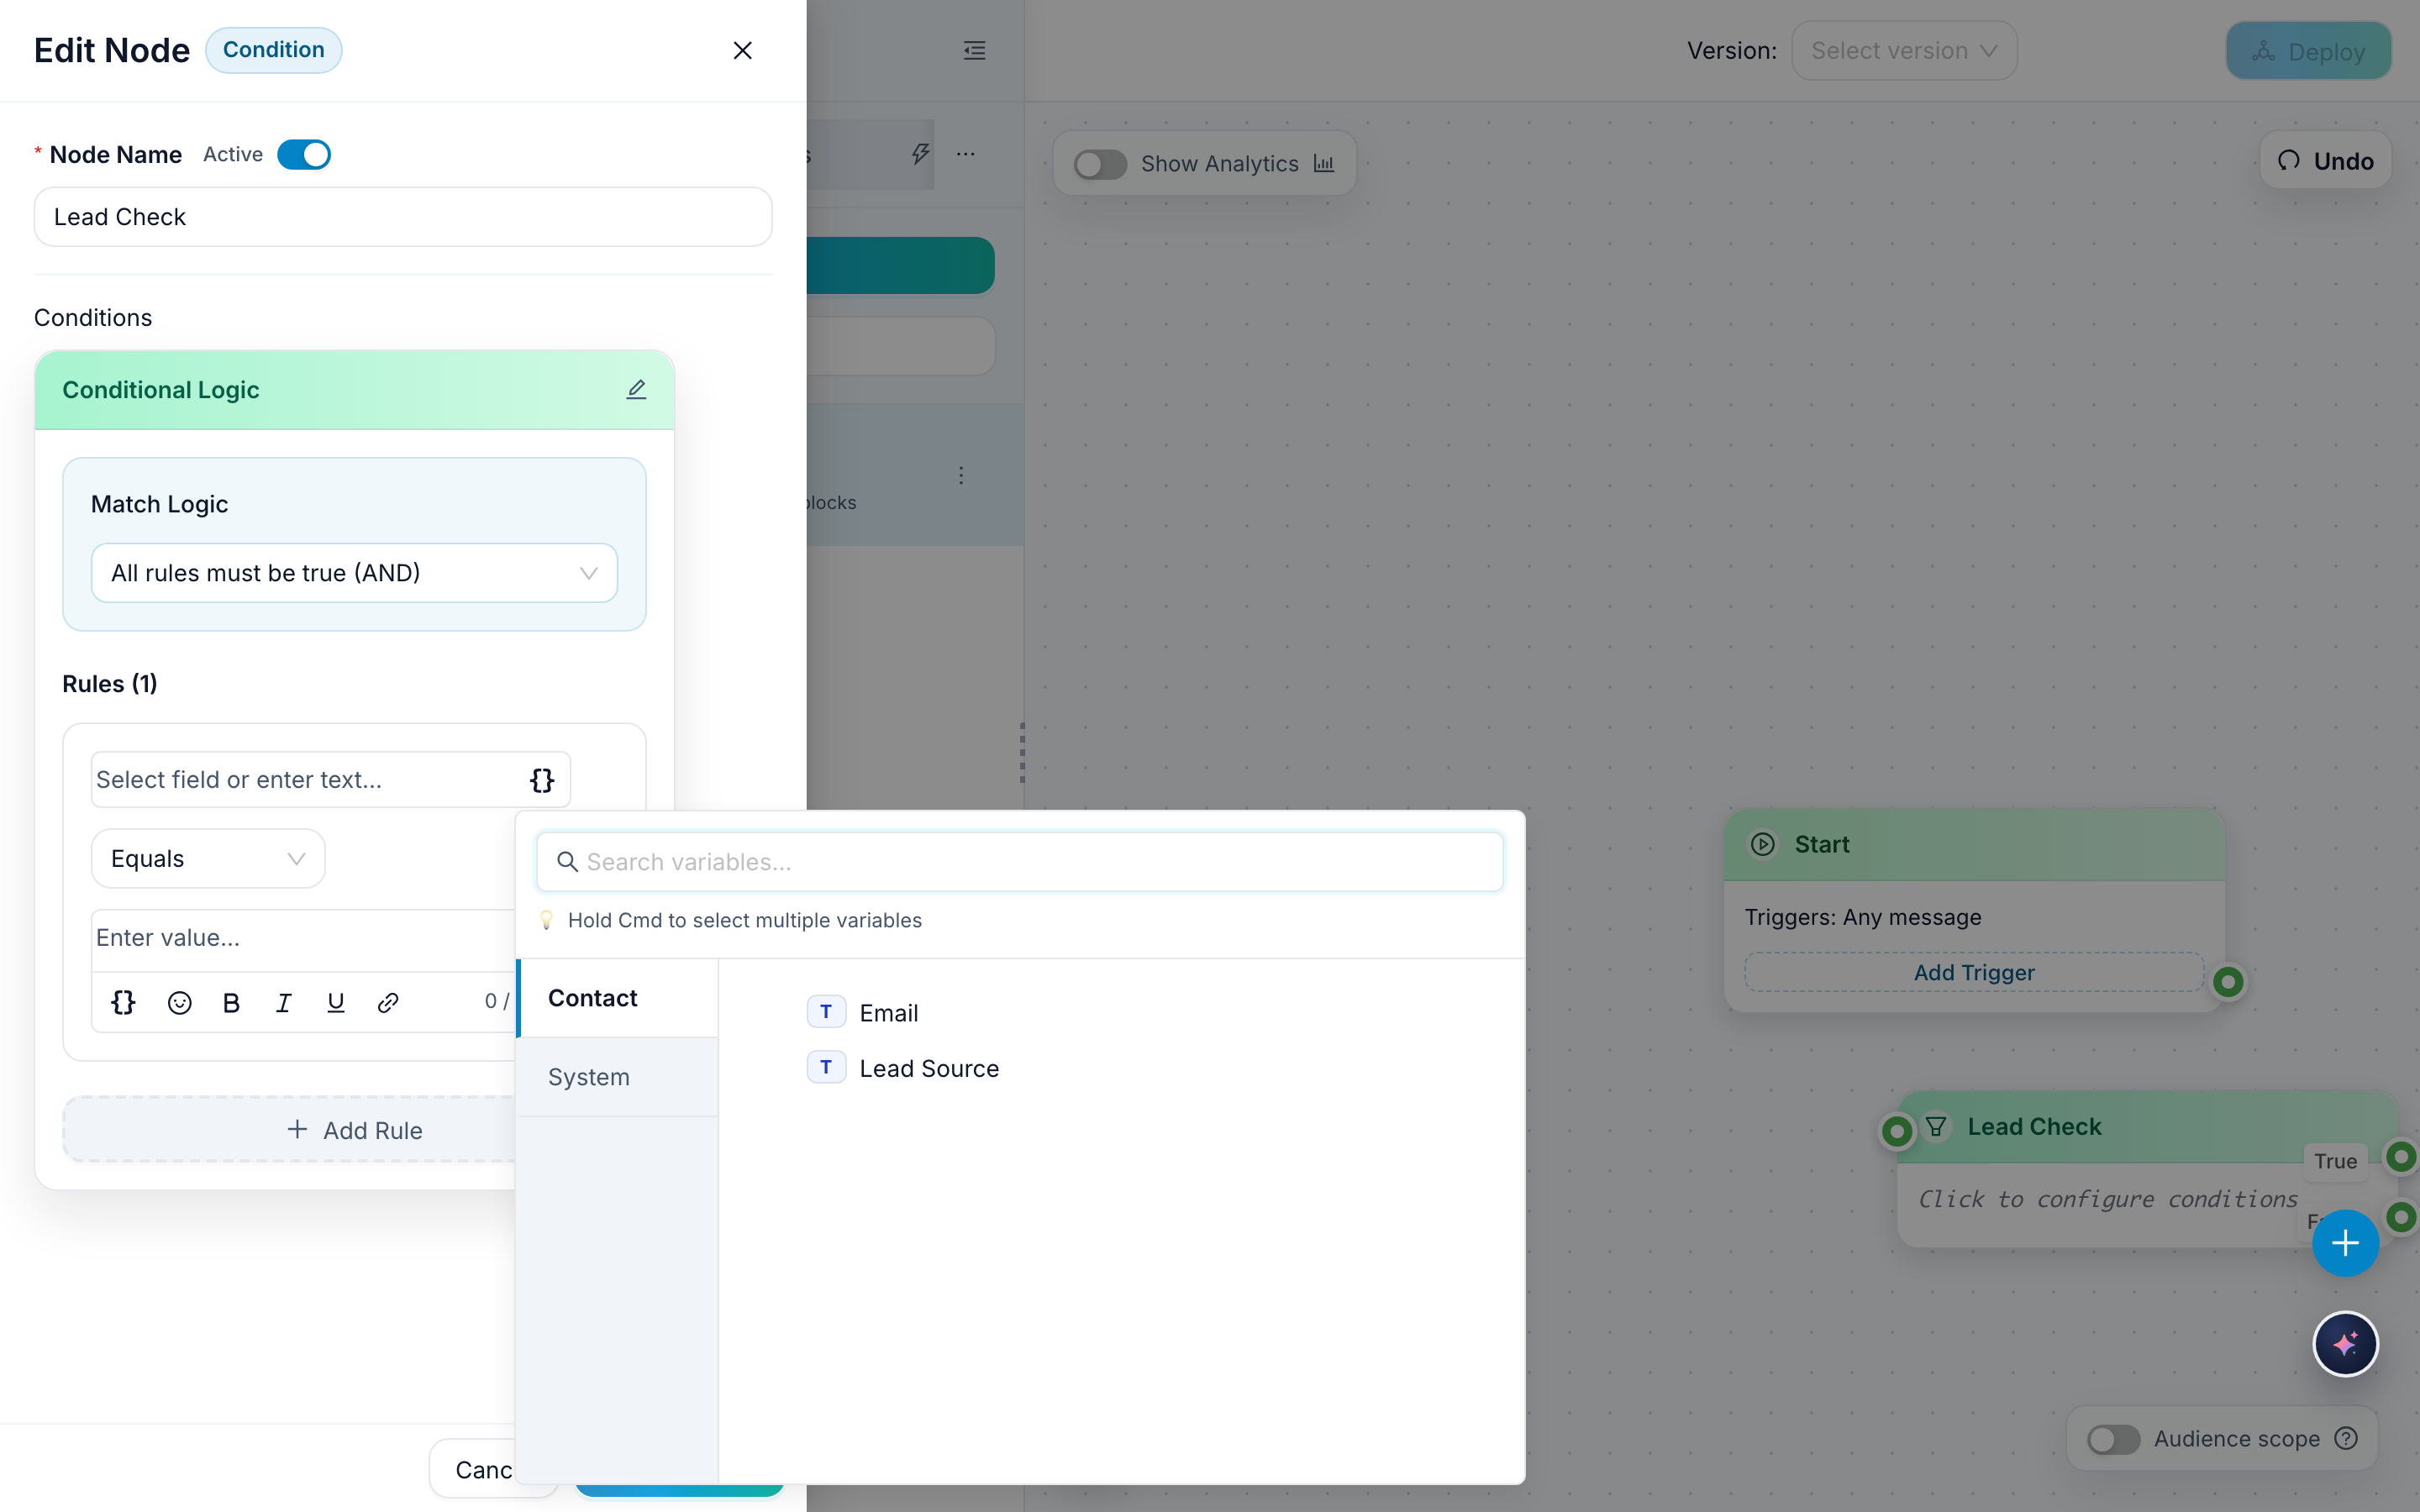
A good habit is to choose the most direct source possible. If the data already exists on the contact, use that instead of recreating it elsewhere in the flow.
Step 3: Choose the operator that matches your logic
After selecting the field, choose the operator that describes the test. For example, Equals is useful for exact matches, Contains is useful for partial text checks, and Is not empty works well when you only need to know whether a field has any value at all.
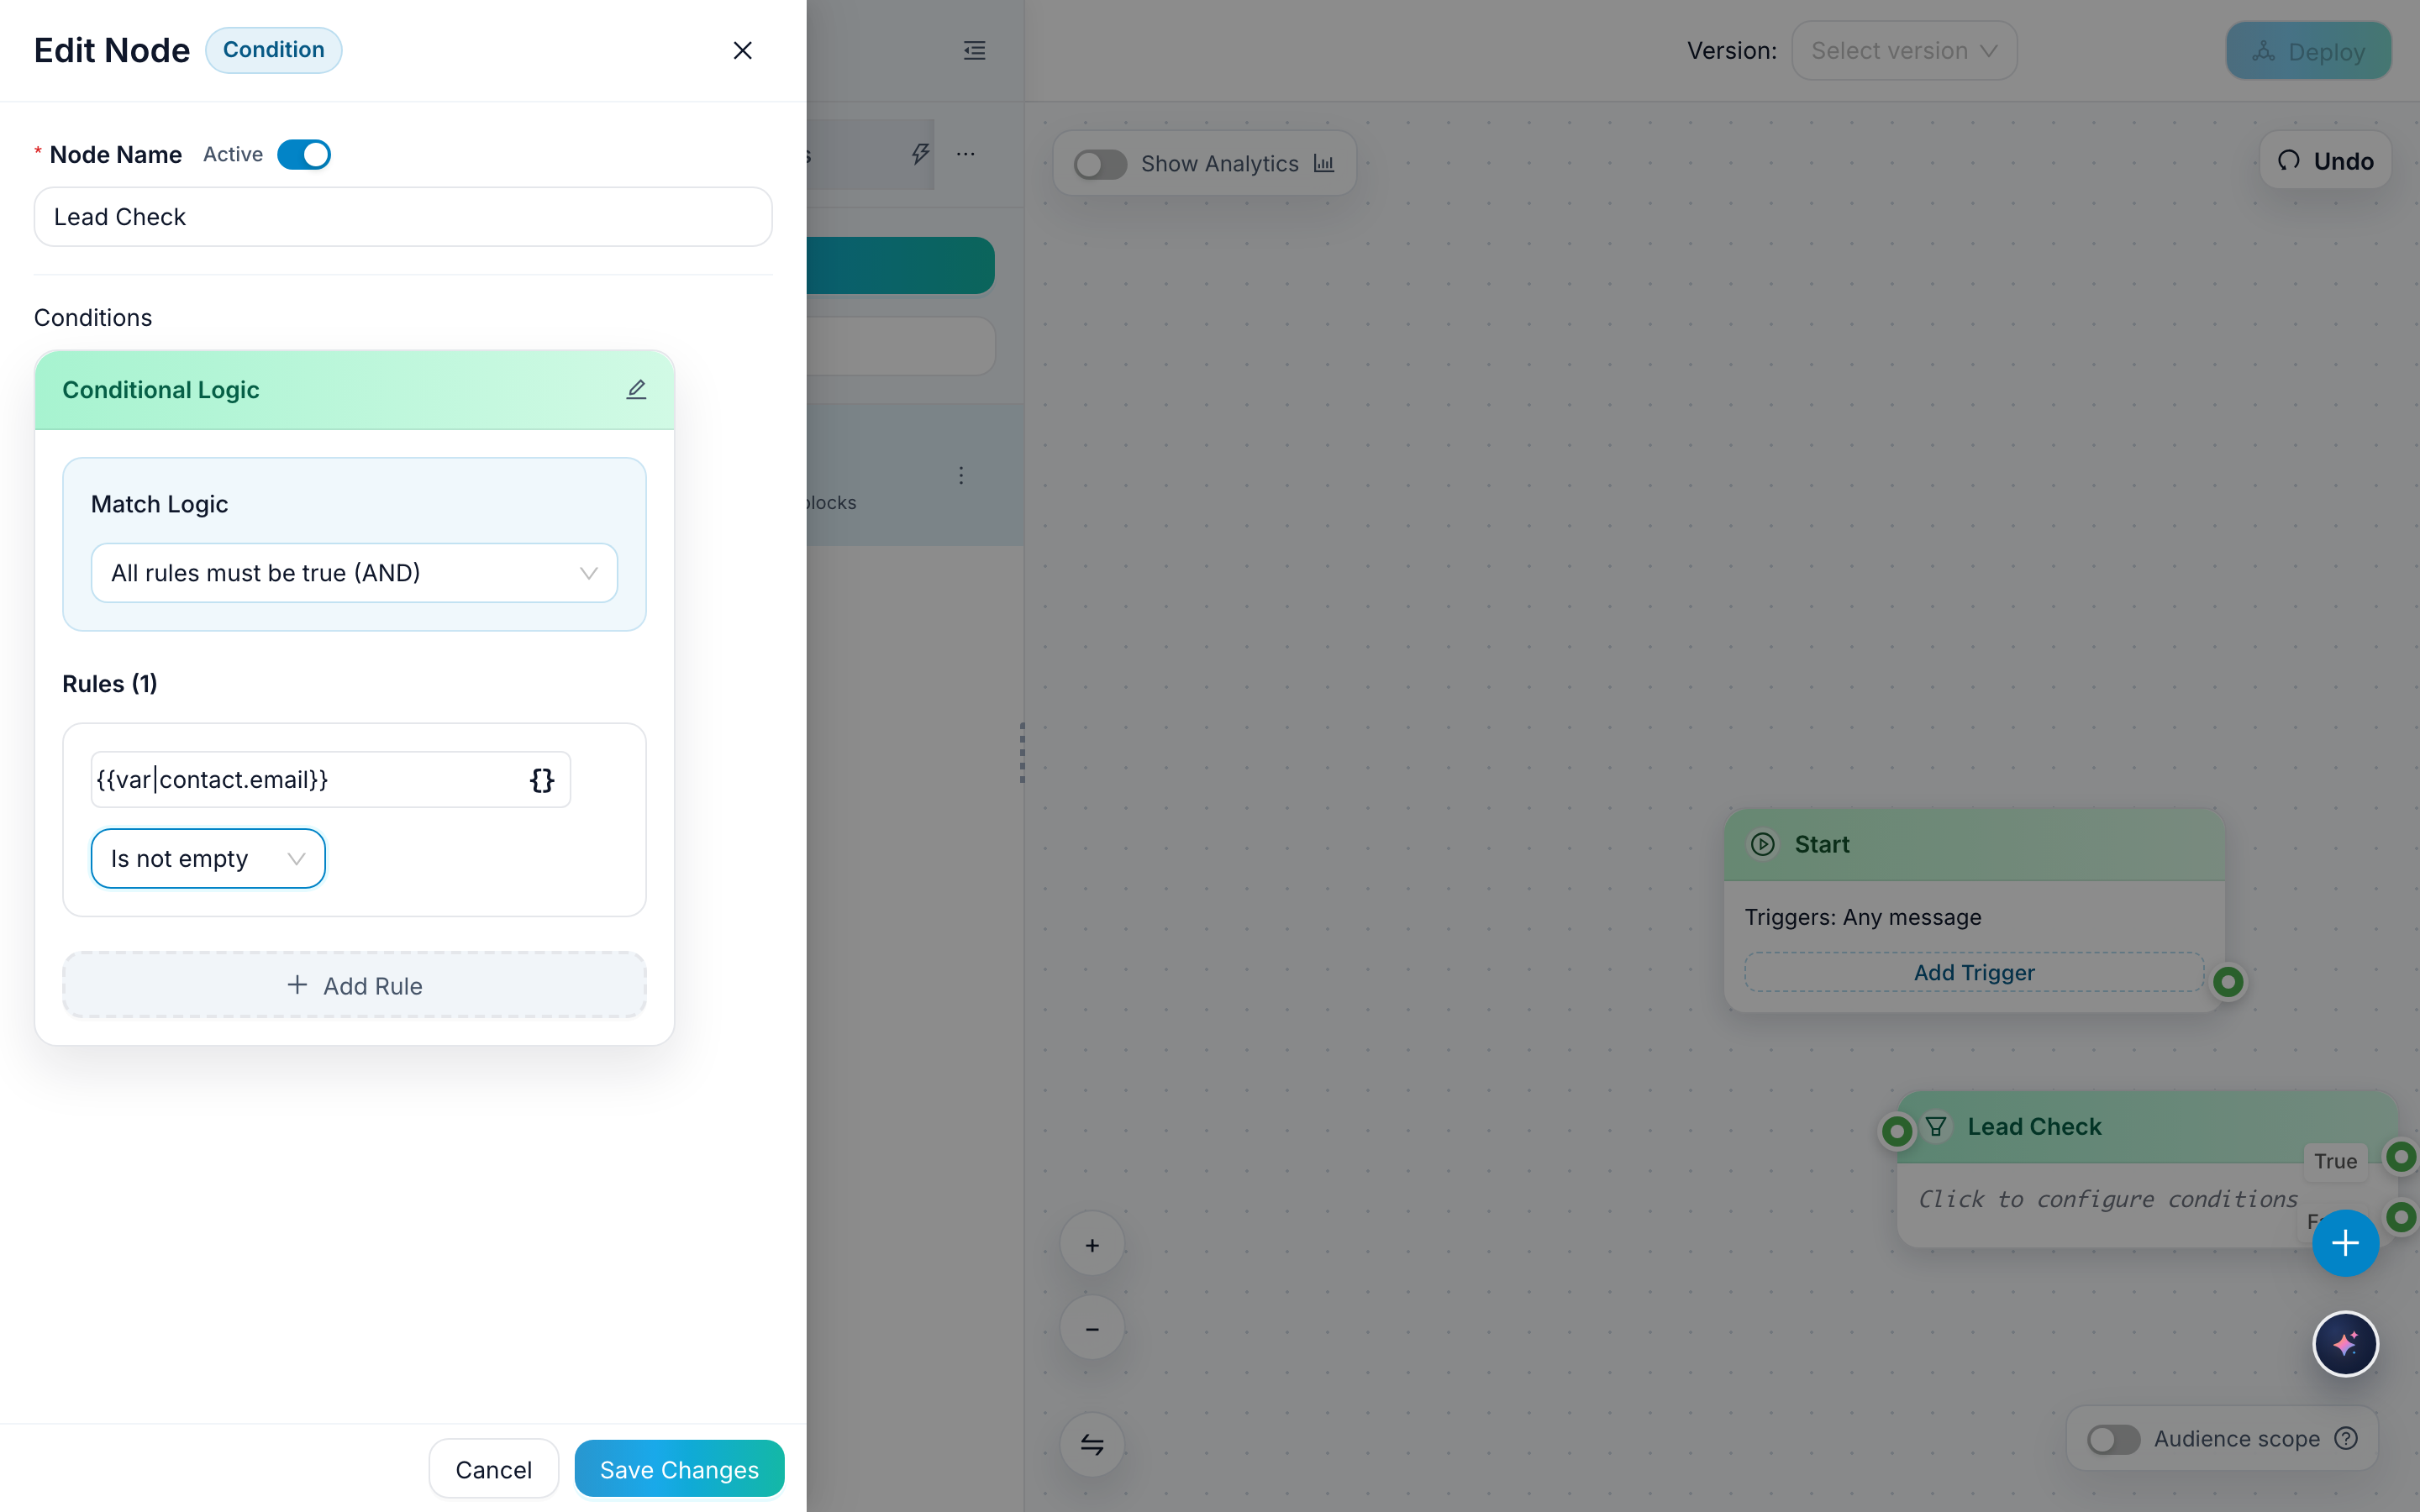
Pick the simplest operator that expresses the rule correctly. That makes the condition easier to understand later when you revisit the flow.
Step 4: Use All vs Any when you add more than one rule
If you add multiple rules, choose whether the node should require All rules to pass or allow Any rule to pass. Use All when every condition must be true together. Use Any when one matching rule is enough to continue.
Step 5: Connect the true and false branches
A Condition node only becomes useful when both outcomes lead somewhere. Connect the true branch to the path that should run when the rule passes, and connect the false branch to the fallback path.
This is what turns the node from a simple check into actual routing logic.
Step 6: Review the logic before publishing
After saving the node, read the rule once more and check that both the true and false branches lead to the correct next step. A quick manual review usually catches missing connections or backwards logic before the flow goes live.
What to improve next
Condition nodes work best after your Message nodes are already clear. Pair this guide with Message Node Basics when you are writing prompts and buttons, then use conditions to send people to the right follow-up step.