
01What you'll build
People open your bot and send a photo or a video. You get it — with the sender's name — and decide whether to post it. A "suggest a post" bot for a channel, a photo contest, a UGC inbox for a brand.
Two ways to build it. No code, no second bot.
| Way 1: Live Chat inbox | Way 2: forward to a chat | |
|---|---|---|
| Where submissions land | Live Chat in your dashboard | Your private chat or a moderation group in Telegram |
| Nodes | 3 | 4 |
Start with Way 1. Switch to Way 2 when you want submissions inside Telegram.
02Way 1: submissions go to Live Chat
-
Trigger —
/start. -
Message — say what to send:
Send one photo or video you'd like us to publish. Add a caption if you want it shown with the post.
-
Action → Start Conversation. Open the Add Action menu, type "conversation", pick it. Team and agent are optional.
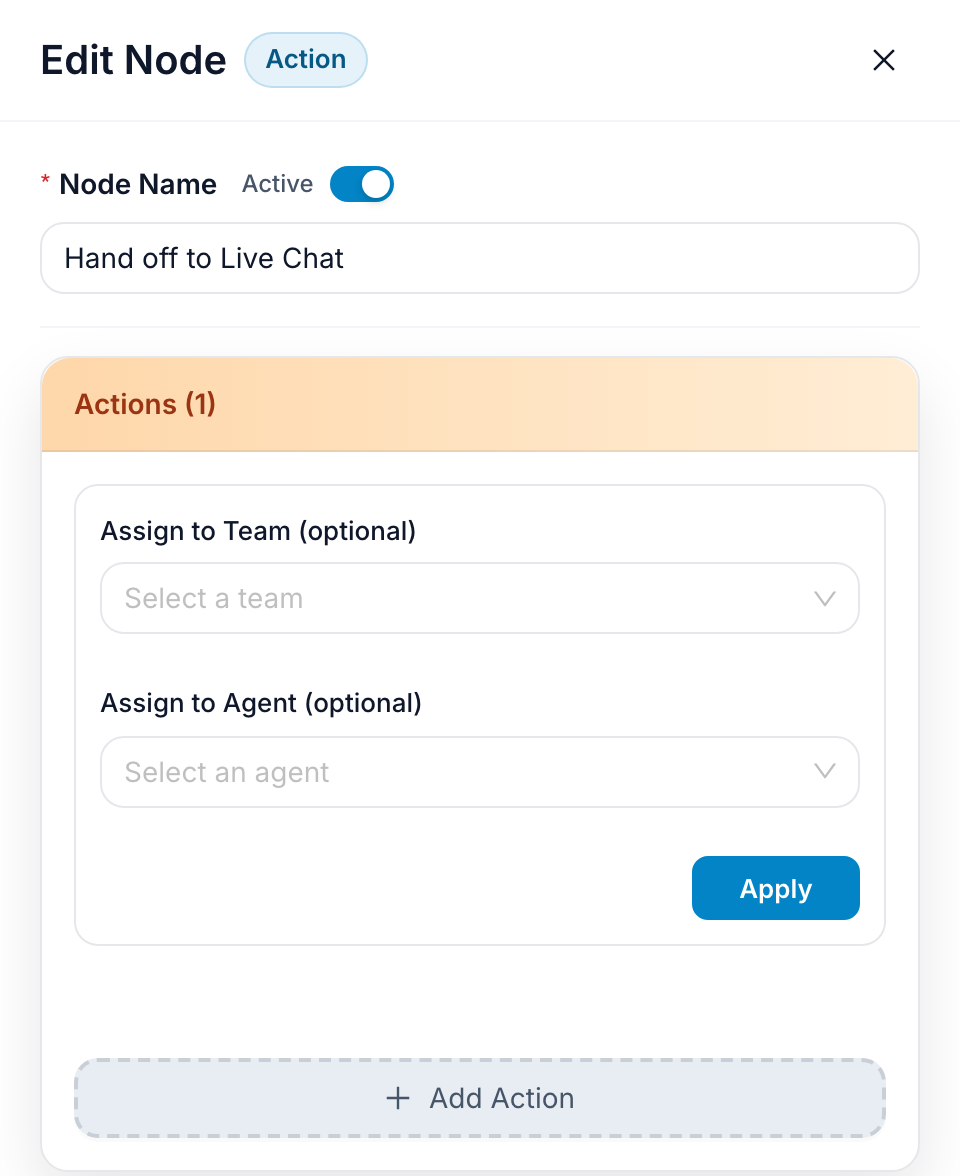
Go live. Every photo, album, video or document a person sends after the prompt shows up as a conversation in Live Chat, with the media inline. Download it, post it, reply if you need something else from them.
03Way 2: the bot forwards submissions to a chat
Four nodes in a row:
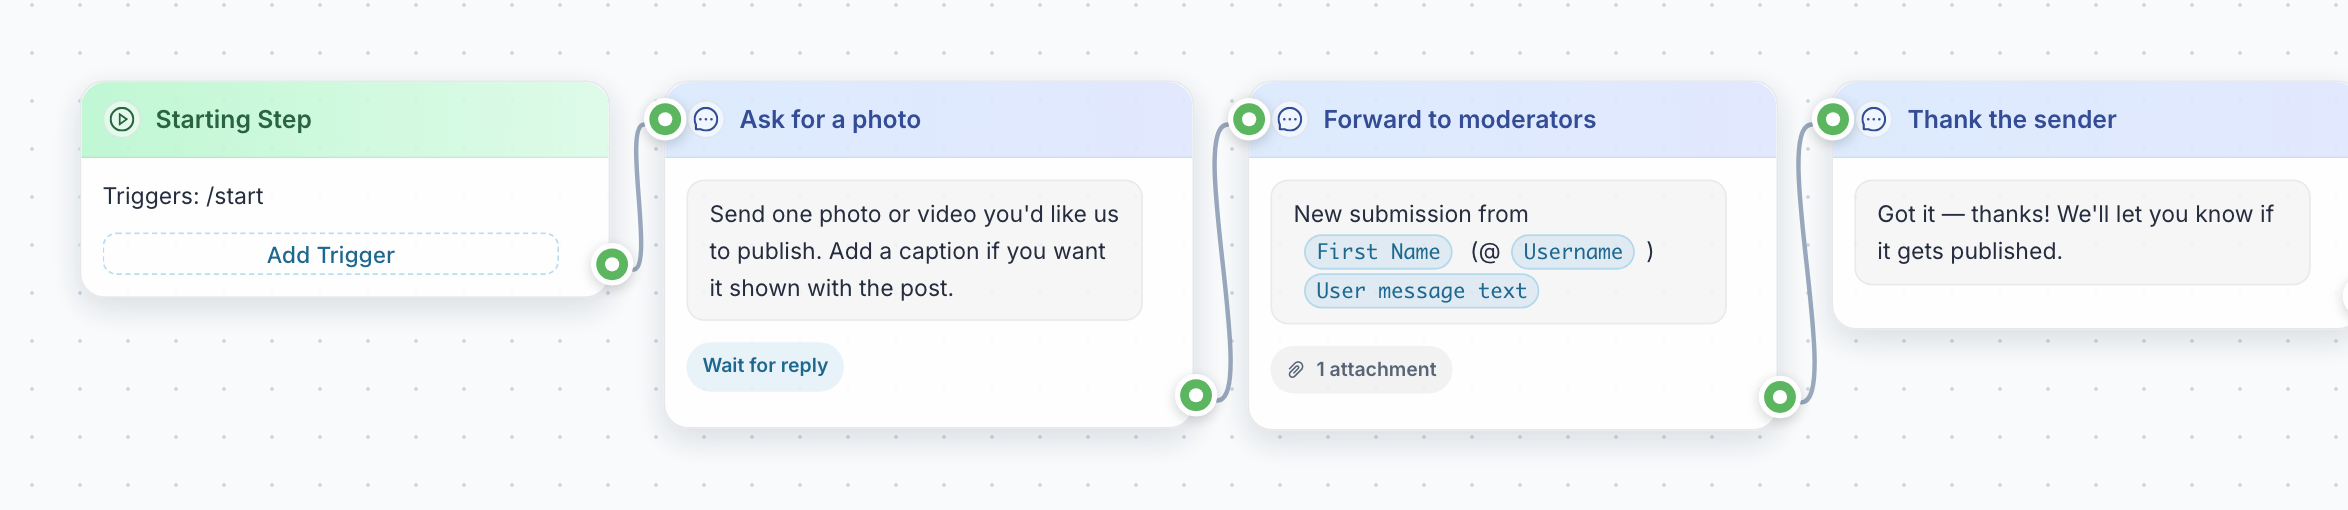
Step 1: ask, then wait
Add a Message with the prompt from Way 1. At the bottom of its editor, turn on Wait for reply. Set Expected reply type to Any text. Leave Save reply to variable empty.
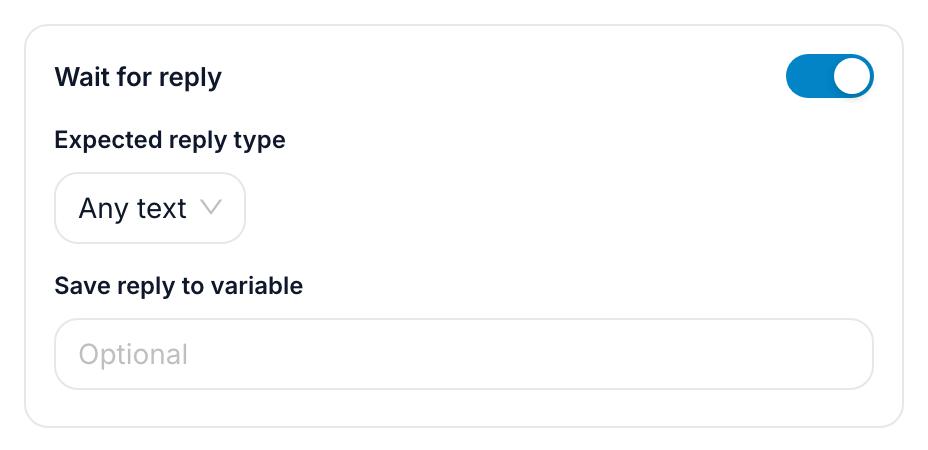
Any text is the option that accepts a photo or video without a caption.
Step 2: forward the media
Add a second Message after the wait. Three settings:
1. Attach the incoming photo. Under 📎 Attachments, click Add from URL. Don't type anything into Media URL — click {}, search "photo" and pick Latest photo from message. A chip appears in the field. Set Media Type to Image, click Add Media.
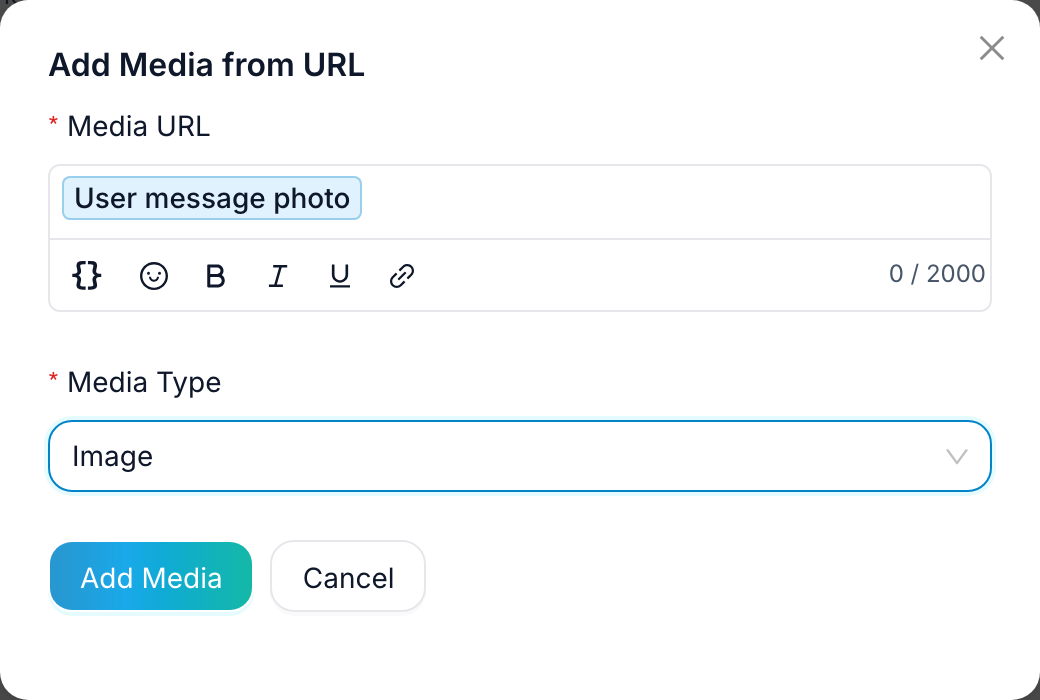
Accept videos too? Repeat with Latest video from message and type Video. An empty chip is skipped, so a photo-only submission sends the photo and a video-only one sends the video.
2. Caption. In the message text, insert chips from the picker:
New submission from {{first_name}} (@{{username}})
{{message_text}}
3. Destination. Under Send to, choose Specific chat. On the Contact tab, search for yourself and pick your own contact — press Start in your bot once so it exists. To send to a moderation group instead, pick the group (add the bot to it first). If the messages are for you, the owner, there is a shorter way: choose Workspace owner instead of Specific chat and skip the contact search.
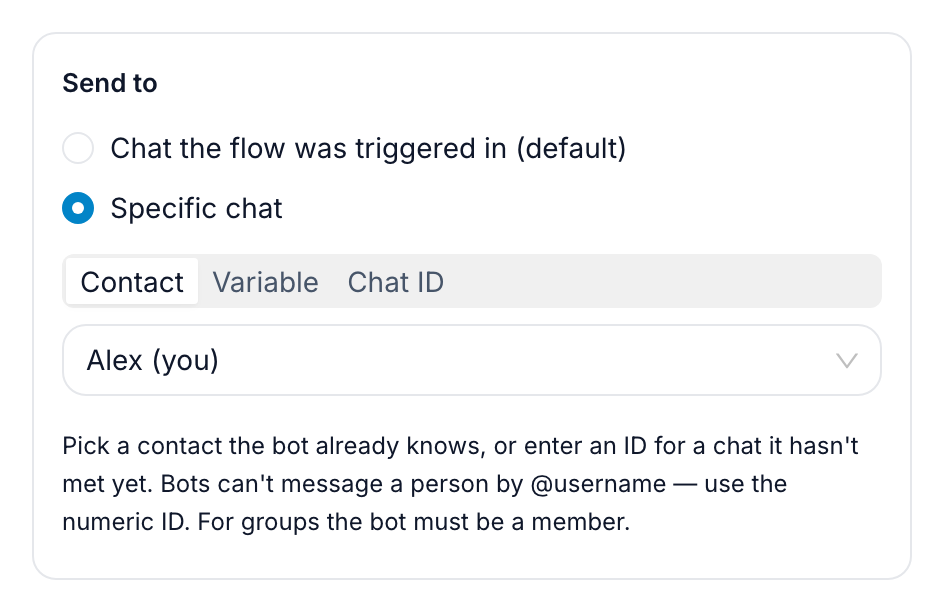
The picker lists people, groups and channels the bot already knows:
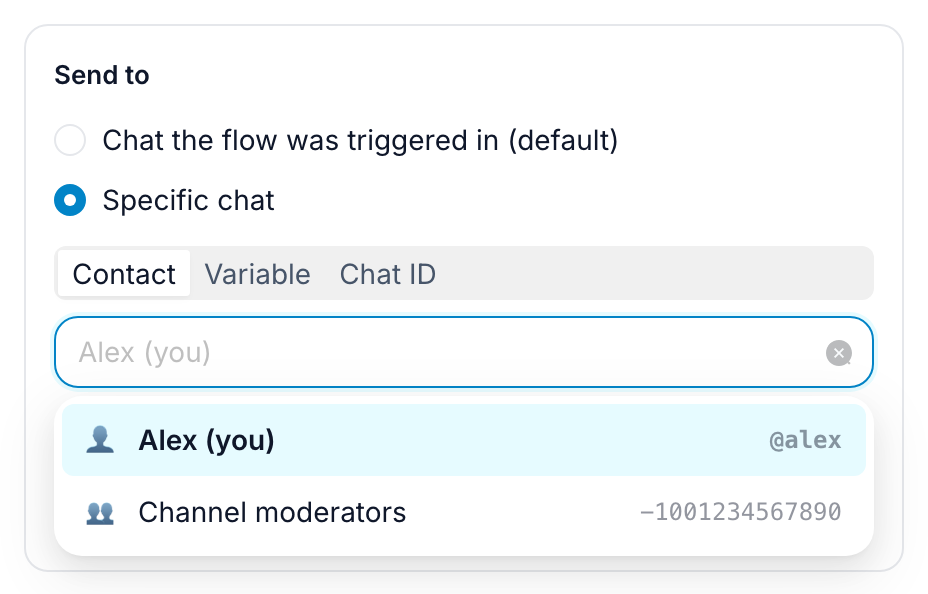
The other two tabs: Variable for a chat ID stored in a variable, Chat ID for a chat the bot hasn't met yet — a numeric ID, or a public group's @username. Bots can't message a person by @username.
Step 3: confirm to the sender
Add one more Message, default Send to:
Got it — thanks! We'll let you know if it gets published.
Step 4: test
Click Test, send /start, then send a real photo from your phone. The group should get the photo with the caption; you should get the confirmation.
Got the caption but no picture? The Media URL holds typed text instead of the chip. Reopen Add from URL and insert it from the {} picker.
04Why there are no Publish / Skip buttons
You could put buttons on the forwarded message — they work in your chat. But when you press one, the flow continues in your chat, as a new event: it no longer holds the submitted photo or the sender. A "Publish" branch could neither post the photo to your channel nor reply to the author. So just forward the photo from your chat to the channel by hand. That's the moderation step, and it's one tap.
If you need the bot to tell the author when their photo is published, that's a different design — a flow that runs on the sender's side, see Notify an Admin or Send a Message to Another Chat.
05Common mistakes
- Typed placeholder in Media URL. Hand-typed text is just text. Insert the chip from
{}. - Expected reply type is not "Any text". A photo without a caption fails validation and the bot asks again.
- Text-only reply. If the person sends plain text, every media chip is empty and the forward step fails. Keep the prompt explicit: "send a photo or video".
- Typing a person's @username on the Chat ID tab. Bots can't address people by username. Pick them on the Contact tab instead. For groups, the bot must be a member.
06What's next
All the ways a bot can message someone other than the current user, side by side: Notify an Admin or Send a Message to Another Chat